Reusing items around the house are the best types of DIY's. Cheap-o, which just so happens to be my middle name (well, I wish it were my middle name). I've seen some fun washer necklaces on Pinterest so I thought I'd give it a go.
So get collecting those extra parts you have from putting together your Ikea furniture and get makin' some jewelry!
STEP 1 / Gather the parts. I wanted to paint one of the washers yellow, so I got out my yellow acrylic paint and a brush. I had the washers, bolts and some off-white ribbon. I picked up a spool of copper wire at a local craft store, the one I used is 28 gauge and I got 40 yards for $4.99, this one is similar, and you can make a bunch of necklaces from 1 spool!
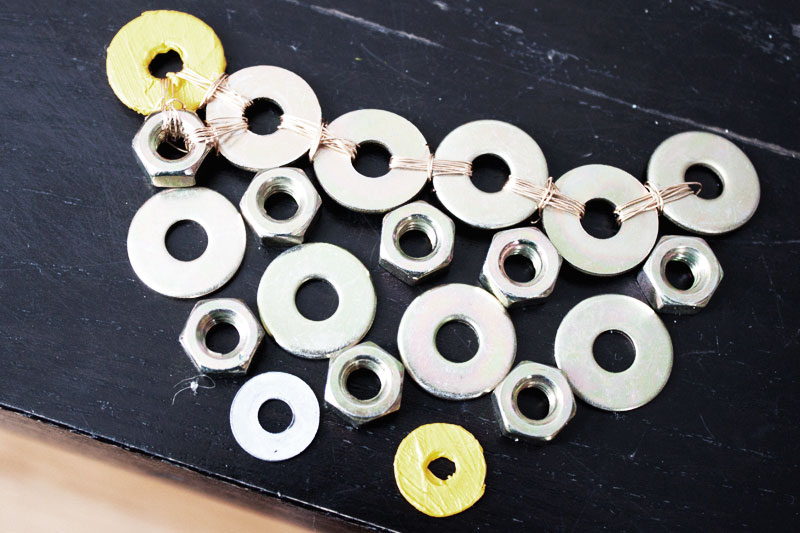
STEP 2 / Layout the design. In the above image, some of my washers are wired together already, this is because I'm an arse and my original design was not doable. Its ok to change as you go. The parts I chose were too small and wouldn't reach correctly. You'll also see that the above design is not the final either! Let it evolve, don't get frustrated. Take a deep breath and get creative, isn't that the point?
STEP 3 / Get wiring! The length of the wire you need to cut will depend on the pieces you are using. Mine was approximately 3 inches to allow me to wrap the amount of times I wanted. Connect the first row of washers with the copper wire. Wrap around as many times as you like, I found that 3 worked well and look realllll nice.
Come up vertically around the back and around over the front. I also did this 3 times. This not only looks pretty, but secures the washers side-by-side. WARNING: I didn't secure my wires well in the back after each one was done, and they poke-poke-poke at me when I wear it (I turned the necklace upside-down to make it stop!). Secure those babies off well EVERY TIME, just tuck 'em under the wrapped wire, you'll thank me later.
Keep repeating across until you have your desired amount in the row...
... then move on to the next row below. Secure the second row by wiring to both the top left and the top right washer above, using the same method you did before....
... and then the next row, again securing to both the top left and top right of the row above. NOTE: If you cut the sure too long, you can use the same piece to secure the piece to the left and right, works just the same.
AND JUST KEEP ON GOING until you have the design you want. TA-DA!
STEP 4 / Lets make this beaut a necklace! Cut 2 pieces of wire equal sized, 2 inches will work (one for each side of the necklace) to make loops for the ribbon. Loop the copper wire around the washer on your top left. Loop the ends of the wire around & around & around until its alllll used up. Repeat on the right side.
STEP 5 / Tie the ribbon! Tie whatever knot you want, above is the way I did it. Each side of my necklace has 2 loose ribbons, which I thought was adorable. Do you have a fancy knot-tying degree and can do it better? Go for it!
I wore this earlier this week under my colar like pictured above and got so many compliments. You could use string instead of wire, and whatever sized washer you have around, do it cheap, you'll be even more excited about its beauty if it cost nothing, or practically nothing!
What are some other items you have around the house that can be repurposed?!


