
WEEKNIGHT DINNER / Bread Bowl

Last week we talked about making a massive pot of soup in no time, which was great (and I still have a bunch in the freezer), but I got to thinking, what can spice this baby up a bit?
Let's take that 30 Minute Canellini and Zucchini Soup up a notch and serve it in a BOWL OF BREAD! Simple enough!

GARLIC AND BUTTER BREAD BOWL
PREP AND COOK TIME / 15 MINUTES TOTAL
YIELD / ONE BOWL - BUT MULTIPLY FOR AS MANY AS YOU NEED!
INGREDIENTS /
One round loaf of bread- approx. 6-8 inches
2 tbsp butter
1 tbsp chopped garlic

Cut a "cap" off the loaf and hollow out a bowl in the center, leaving enough of a wall so it won't collapse (and also so you can eat it when it is soaking up that delicious soup!).

Melt the butter and mix it with the chopped garlic.
Place the bread on a piece of foil and brush or spoon the mixture onto the bread, both the exterior and interior of the bowl. Cover it completely!
Place the coated bread in the toaster oven on the foil and toast on your bread setting for about 10 minutes, or until the bread starts to turn a nice golden brown.
Don't have a toaster oven, no problem! Preheat your oven to 350˚F and place the bread on the foil in the oven and bake for 10 minutes, or until the butter and garlic start to get nice and golden brown.
Either way, it will be delicious, its bread with BUTTER AND GARLIC COATED ON IT, HOW COULD THAT BE BAD?! - The answer is, it can't.

Take the bread out of the oven and place in a bowl and fill it with hot soup and you're all set!

The bread bowl will soak up much of the liquid, and take in even more flavor. As you eat the soup, you can eat the bread too, its like dipping bread in your soup, but even better!

I think this would be a perfect meal to whip up during the week, but you could even serve this at a dinner party, pumping up a simple bowl of soup and really impressing your guests.
You can add some spices to your mixture to elevate the flavor even more and to accent the taste of your soup. Maybe some fresh parmesan cheese and fill it with a can of tomato soup? How easy (and amazing) does that sound?!

WEEKNIGHT DINNER / 30 minute Canellini & Vegetable Soup

Theres a serious chill in the air in NYC. I know, it's December of course it's cold, but man I was not ready for it!
There's pretty much nothing better than a hot pot of soup cooking on a chilly night.
I love making soup for a few reasons.
1- The warmth and scent it gives the apartment.
2- The versatility of it.
3- The yield- dinner for days!
4- THE EASE!

This soup is super easy, incredibly delicious and quick!
Using beans in both the base and as a stir in gives this soup some weight and protein which enables it to be a great, filling meal.
CANELLINI AND VEGETABLE SOUP
PREP & COOK TIME / 30 MINUTES TOTAL
YIELD / 8-10 SERVINGS

INGREDIENTS /
¼ cup Olive Oil
2 Small Zucchini (or one large)
1 Large White Onion
1 Bundle of Fresh Spinach
1 tbsp Garlic, chopped
½ tsp salt
1 tbsp black pepper
1 tbsp Fresh Thyme Leaves
½ cup grated parmesan cheese ( + more for garnish, optional)
1 Can Diced Tomatoes (14.5 oz, no salt added preferred- Don't drain!)
2 Cans Canellini Beans (15 oz)
1 pkg Vegetable Stock (32 oz- Chicken or beef can be used)

1 / Heat the oil in a large pot over low-medium heat. While the oil is heating, dice zucchini and onion.
2 / When the oil is warm, add the zucchini, onion, spinach, garlic, salt, pepper, thyme, and parmesan cheese. Stir with the warm oil, turn the heat up to medium and let cook for 5 minutes, stirring occasionally.
3 / While the vegetables are cooking, using a masher or back or a large spoon, mash 1 can of canellini beans until almost smooth.
4 / After the mixture cooks for 5 minutes, stir in the tomatoes, both the mashed beans and the second can and the container of vegetable stock. Raise the heat to high, cover and bring to a boil. Cook for an additional 20 minutes, stirring often.

Alright, you caught me, I used carrots and didn't tell you to.
Here's the deal- when I was cooking this baby up, I thought to myself "Veggie soup IS NOT soup without some carrots", so I used a cup of baby carrots, but I think that they don't belong with the smooooooth flavors of parm and bean. Your call though bud. If you want to use carrots, throw them in the pot when you toss in the other veggies. They may take a bit longer to break down than the other veggies, so you'll have to cook it longer OR cook them a bit before you toss them in the pot with their friends zucchini and spinach.
This soup is my A#1FAVE soup I've ever mixed up, and I think the mashed canellini bean base is the reason. White beans add a creamy, sweet flavor to the broth. It's pretty ace. My roomie, who is not a veggie fanatic like me and DOES NOT like beans thought it was pretty ace also, so ya know, I'm awesome like that, converting the haters and all.

Sprinkle some more parm on to and call it dinner (everyone likes a bit more cheese, right?).
Like I said earlier, one of my favorite parts of making a big pot of soup is the amount it makes! Let the soup come to room temperature and pour into plastic containers (I can't be the only one who saves all my take-out soup containers... right?) and stick in the freezer! Soup can freeze for 2-3 months! When you're ready to dive back in, defrost in the refrigerator and then heat in either the microwave or in a saucepan on the stove. Easy-peasy around here.
What kinds of soup do you like to make when the air gets crispy?

Weeknight Dinner: Autumn Veggie Tart
This week I'm introducing a new post to the blog: WEEKNIGHT DINNERS.

Recently, I have been ordering WAY too much takeout. Admit it, you've been there. You get home from work, you're tired. Maybe someone pissed you off in the office. Maybe the commute was a total drag. Maybe life is just exhausting sometimes.
But guys, there are SO MANY amazing things we can whip up real fast or that are super easy to make, so lets start!
This week I threw together a super simple tart. This dish is so versatile and so simple and SO YUMMY.
Checkout the recipe and some suggestions of different types YOU can make below. YOU CAN DO IT.

Let's talk ingredients.
Large Yam
Brussel sprouts (approx. a dozen were used)
Small Tomatoes
Small Potatoes
Fresh Thyme
Salt & Pepper
½ cup Ricotta Cheese
¼ cup Olive Oil + about 2 tablespoons
Puff Pastry (Purchased Frozen/ premade- we're keeping this easy- but make sure to thaw as the package instructs)

For the tomatoes and potatoes, I picked up packages at Whole Foods which had varieties of each. I wanted to give this dish a beautiful palette, but any small potatoes or tomatoes will do! Cherry? Heirloom? Fingerlings? Baby Red? Go for it! I told you this baby was versatile!
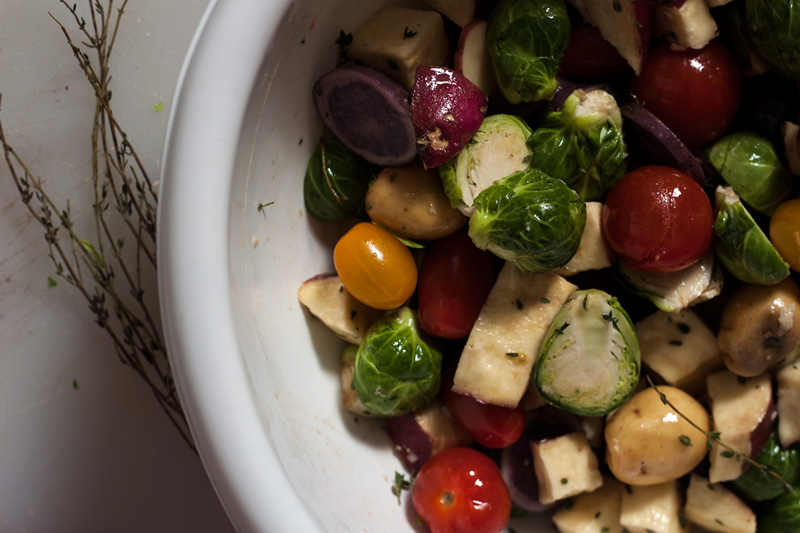
1 / Preheat oven to 400˚F. Cut the yam into cubes and the brussel sprouts in half. Cut the potatoes also if you feel like should be smaller pieces, you're the one eating this! Toss the veggies in a large bowl with the ¼ cup olive oil, leaves of thyme and a sprinkle of salt and pepper.
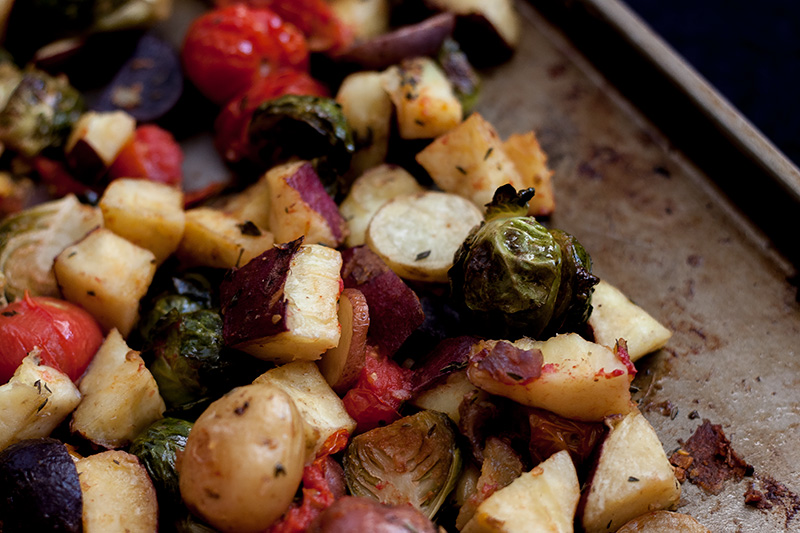
2 / Spread the prepared veggies on a baking sheet in 1 layer and place in your preheated oven for 20 minutes. About halfway through, toss the veggies so they get evenly cooked.
3 / After 20 minutes, turn your oven on the HIGH BROIL setting for an additional 10 minutes, again tossing them about halfway though.

4 / Meanwhile, while the vegetable finish up, lets prepare the pastry! As I mentioned above, thaw it as the package instructs you to do. Mine said to defrost by leaving at room temperature.
Drizzle most of that extra olive oil in the ricotta and give it a good stir, leaving some oil to grease your pan. Sprinkle in some salt and pepper to taste. Give a baking sheet a thin coat of olive oil and lay your defrosted puff pastry out. Don't worry if your dough is a little too big for your pan, we are going to fold the sides in! Spread the ricotta down the middle of your dough, staying about 1-2 inches from the edge.

5 / Place the cooked vegetables on the ricotta cheese on the pastry dough. Fold in those edges as pictured above.
You will likely have some extra veggies for snacking!

6 / Bake as the puff pastry dough instructs. Typically 25-35 minutes, or until golden brown. I baked at 430˚F for 25 minutes and it was perfect!

Not only is it SUPER easy to work with, Puff Pastry Dough is buttery and flaky and QUICK because we don't have to make a damn dough ourselves!
This was a perfect dinner. My roommate and I split it and were WAY stuffed. I think it could certainly serve 3 or 4 people if someone else whipped up a side dish, what do you think?
Like I said, SUPER VERSATILE! Try out some different veggies! Different cheese! Add some meat! The possibilities are ENDLESS I TELL YOU!

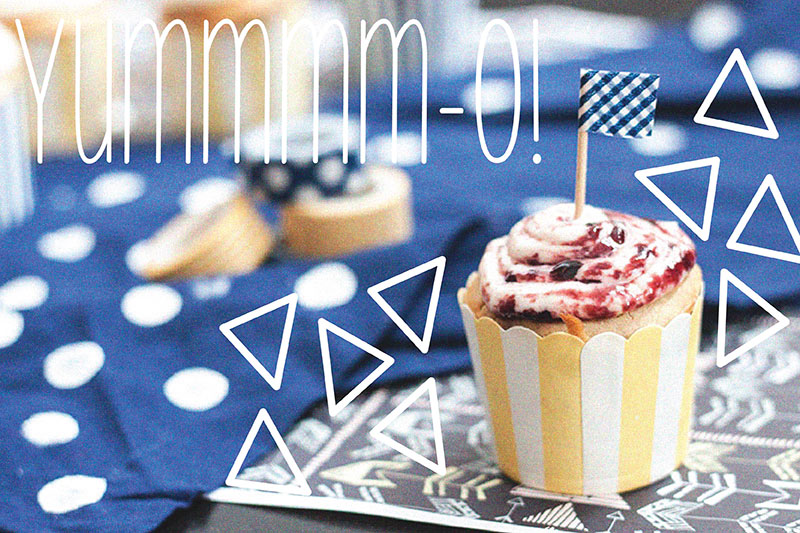
Roasted Blueberry & Lemon Cupcake w. Cream Cheese & Blueberry Jam

Who doesn't freakin' love blueberry, raise your hand... I don't see any hands raised so I'm going to go with NO BODY. I mean, not only are they BEAUTIFUL IN COLOR but they are tasty as can be! Baked, they get even better.
When I was trying to decide on what recipe to use for my AltSummit card, I struggled, hard. I LOVED the Pineapple-Upside-Down cupcake we did a few weeks ago, and I had thought that it would be so versatile. WRONG.
Here's the issue. Yes. It was a fantastic cake. Yes, I want to eat it ALLLLLL THE TIME. BUTTTTT because the batter is so loose, the roasted blueberries sank to the bottom, which made for a problem scenario. The blueberries sunk (and I might have to admit that I used a MASSIVE AMOUNT OF BLUEBERRIES so it took up half the liner when they sunk- oopsies) and the cupcake just couldn't bake properly. So, lesson learned, loose batters are NOT ideal for adding fruit. You're welcome. (They were VERY tasty, but they overflowed funny, and looks all cray-cray so there was NO WAY I could use it for my AltSummit recipe!)
OK MOVING ON! Second try on this, and we have a winner! I scraped the idea of reusing the other batter and it worked out just fine!
CLICK HERE FOR THE FREE DOWNLOADABLE RECIPE CARD.
Yields 12 Cupcakes in a standard cupcake pan

FOR THE BATTER /
1 ⅓ cup flour
3 tbsp. corn starch
¼ tsp. baking soda
1 tsp. baking powder
½ tsp. salt
1 tsp. cinnamon
1 stick unsalted butter, room temperature
⅓ cup sugar
2 eggs, room temperature
1 tsp. vanilla
¾ cup vanilla yogurt
1 ¼ cup fresh blueberries
Zest of ½ a lemon

1 / Preheat oven to 375˚. Line a standard cupcake pan with 12 liners.
2 / Destem and clean the blueberries. Lay blueberries out on a cake or cookie pan (with sides). Place on center rack of the oven and cook for 10 minutes, or until blueberries start to burst. Remove from oven and allow to come to room temperature.

3 / Sift together the flour, cornstarch, baking soda, baking powder, salt and cinnamon. Set aside.
4 / Beat together the butter and sugar until light and fluffy, then beat in eggs.
5 / Mix the vanilla into the yogurt.
6 / Alternating between the dry ingredients and the yogurt, beat the ingredients into the butter mixture until well combined.
7 / Zest half a lemon and fold into the batter.

8 / Gently fold in the roasted blueberries.

9 / Fill the cupcake liners evenly, ⅔ the way full. Bake for 21-25 minutes, or until a cupcake tester inserted in the center comes out clean and the edges of the cupcake are golden brown.

FOR THE FROSTING /
1 stick butter, room temperature
8 oz. container of cream cheese
½ tsp. vanilla
2 ⅔ cup confectioners’ sugar
¼ cup blueberry jam

1 / Beat together the butter and cream cheese. *Guys, I've been into using the round container of cream cheese instead of bars lately, I feel like they get a creamier frosting, I may never go back!
2 / Add the vanilla.
3 / Slowly, in 3 parts, beat in the confectioners sugar until there are no lumps and the consistency is even.
4 / To swirl the frosting and jam, add a large spoon-full of blueberry jam to the center of the bowl of cream cheese frosting. Do not mix the jam with the frosting. (Just like we did with the lemon poppyseed cupcakes a while back.)
5 / Spoon the frosting (with the jam in it) into a frosting bag and pipe as normal. The jam and frosting will swirl naturally!

You can see the washi tape flags getting all ready to jazz up the place.
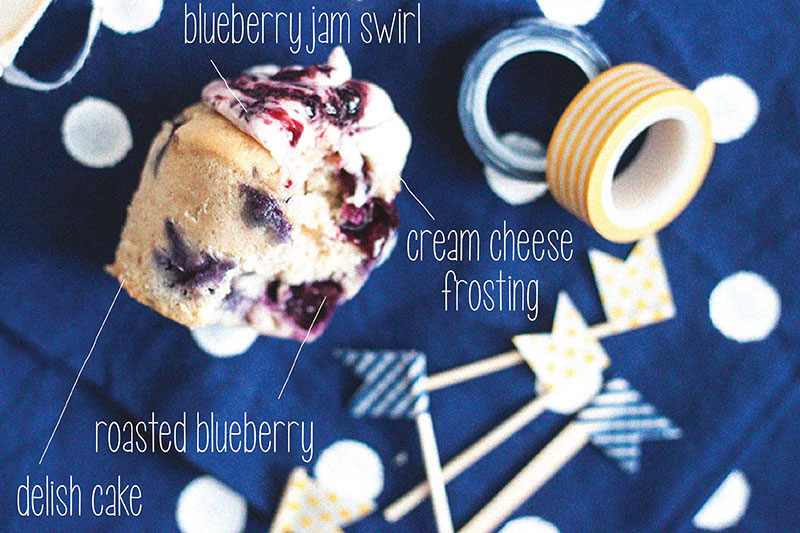
I don't ever need an excuse to eat a cupcake, but I have to say, these would make a lovely breakfast treat! By roasting the blueberries before we folded them into the batter we are bringing out an extra bit of sweetness and flavor, which sets them apart form any other blueberry cupcake I have eaten.
I hope some of my fellow Alt attendees with give it a try and send me some pics! I think next time, I'd add some brown sugar topping, what do you think?
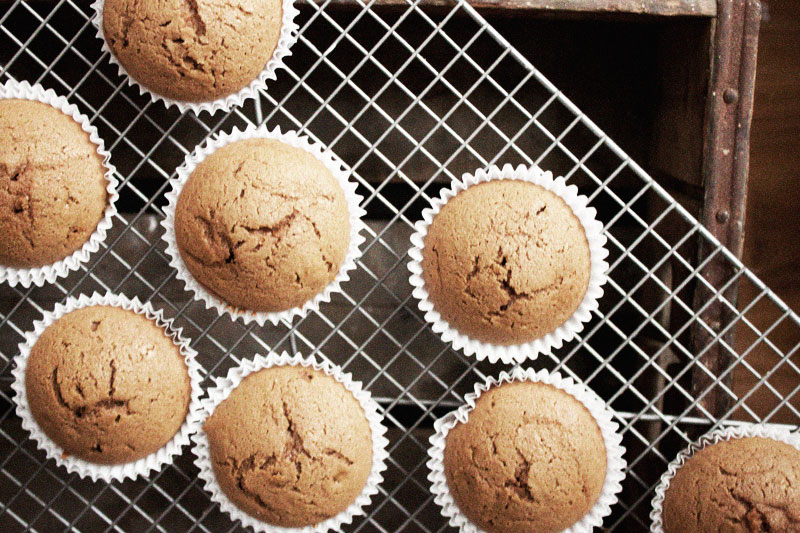
Holiday 2012 / Gingerbread Cupcake w. Cream Cheese Frosting (+ Gingerbread Cookie Topper)

Nothing says holidays like Gingerbread! The smell that fills the house is magical. Gingerbread is perfection, one time a year, and that time is now. I get the catalogs from King Arthur Flour and they are always amazing. Beautiful. Make me want everything! The most recent one they included a gingerbread cupcake recipe, so I though I'd give it a go, and I am pretty happy with the outcome! Between the cupcakes, the cookies AND the CAKE I was baking for my bestie (don't worry I'll share it after the holidays!), I was uber nervous to mess something up, and had no time to start over, so I trusted My Girl Martha (Stewart of course) for the cookie recipe.

Gingerbread cupcake with Cinnamon Cream Cheese Frosting TOPPED with a Gingerbread Cookie. Tastes JUST LIKE CHRISTMAS! (Looks pretty classy too!)
Start with the cookies if you want to make them, they require refrigeration in the process. If you don't wan't to make the cookies, I won't be offended, skiperoo right over the instruction and get bakin' the cupcakes!

Download the recipe card with illustration here for keeps. Recipe with images below...
GET BAKING!
Yields 12 cupcakes in standard liners

FOR THE COOKIES /
2 cups flour (spooned and leveled), plus more for rolling
2 tsp. ground ginger
1 tsp. cinnamon
½ tsp. ground nutmeg
¼ tsp. cloves
¼ tsp. baking soda
¼ tsp. salt
½ cup unsalted butter, room temperature
⅓ cup packed dark-brown sugar
⅓ cup molasses
1 large egg

1 / In a medium bowl, whisk together flour, spices, baking soda, and salt; set aside.

2 / In a separate bowl beat butter and brown sugar with an electric mixer until smooth.
3 / Beat the molasses and egg into the butter mixture.

4 / With mixer on low, add dry ingredients; mix just until a dough forms.
5 / Place dough on floured plastic wrap; pat into an 8-inch square. Wrap well; chill until firm, 1 to 2 hours. * The chilling of the dough is VERY important, don't breeze over this!

6 / Preheat oven to 350˚F. Divide dough in half. Rewrap and refrigerate one half.
7 / Place dough on floured parchment or waxed paper; roll out ⅛ inch thick, turning, lifting, and flouring dough (and rolling pin) as needed.
8 / Freeze rolled dough (on paper) until firm, about 20 minutes. Again, don't skip this step! Keep the dough cold at all times. I made a HUGE mistake and rolled the dough out on the counter above my dishwasher, which was running, and the counter was warm and ruined half the dough. Super bummer, I know, so KEEP IT COOL, learn from my mistakes!
9 / Loosen dough from paper. Cut out shapes, and transfer to baking sheets.

10 / Bake until firm and edges just begin to darken, 10 to 18 minutes, depending on size. Cool completely on baking sheets.

FOR THE CUPCAKES /
1 ¾ cups flour
1 tsp. baking soda
2 tsp. cinnamon
2 tsp. ginger
¼ tsp. cloves
¼ tsp. ground nutmeg
¼ tsp. salt
½ cup unsalted butter, melted
½ cup packed dark brown sugar
½ cup molasses
1 large egg
½ cup water

1 / Preheat oven to 350˚F. Line a standard 12-cup cupcake pan with paper liners.
2 / Combine together the flour, baking soda, cinnamon, ginger, cloves, nutmeg and salt.

3 / In a separate bowl, whisk together the melted butter, brown sugar, molasses and egg.

4 / With an electric mixer, add the half the flour mixture to the butter mixture, then half the water, and repeat. Mix until well combined scraping down the sides of the bowl as needed.
5 / Spoon the mixture into liners filling ⅔ the way. Bake for 16-19 minutes or until toothpick inserted into the center of the cupcake comes out clean.

FOR THE FROSTING /
6 tbsp. unsalted butter, at room temperature
1 package cream cheese, softened
2 cups confectioners’ sugar
2 tsp. cinnamon
2 tbsp. brown sugar
1 / Beat together the butter and cream cheese until light and fluffy.
2 / With the electric mixer running add the sugars and cinnamon beating until well incorporated.
3 / Pipe onto cooled cupcakes.

TA-DA! CHRISTMAS IN A CUPCAKE! King Arthur said to make for 20-22 minutes, but I tested at 18 and they were done, and a bit over done already, so make sure to test around 15 or 16 minutes. They may need more time, but better safe than sorry!
This was my first time making gingerbread, and boy did I learn a lot! Cookies can be hard! I think I might challenge myself to a gingerbread house, any tips?

Super Easy, No Bake Oreo "Truffles"

Ok folks, after this one, you will love me forever, and thats a promise. THE EASIEST most ADDICTING sweet yet, the No Bake Oreo "Truffle". I wish I could take credit for this, but I've had these babies at many-a-holiday party and just needed to share! Click here to download the recipe for later.

These beauts are so adorable, and addictive, everyone will come back (and be begging) for more.

RECIPE BELOW, GET BAKING!
Yields around 24 truffles (depending on the size you make 'em)

INGREDIENTS /
1 package Golden Oreos
1 package Chocolate Oreos
2- 8 oz. packages cream cheese
chocolate for dipping
colored sprinkles (optional)

1 / In a large bowl, crush the entire package of the chocolate Oreos...

... then the Golden Oreos. Crush 'em up real good, as fine as you can, finer then the images above.

2 / Mix a package of cream cheese into the bowl of chocolate Oreos...

... then repeat with the Golden. Get in ther with your hands and mix and mush realllllly well.
3 / Roll the mixtures into approximately 1-2 inch balls and place on a flat surface (like a cookie tray).
4 / Refrigerate the rolled mixture for 10-15 minutes, or until cold and ready for dipping (will depend on how warm they get while rolling).

5 / While mixture is being refrigerated, melt your favorite type of chocolate using your preferred method (either in microwave or in a heat proof bowl over boiling water) until completely melted and smooth. (NOTE: Be careful not to get ANY water in chocolate being melted, the chocolate will not break down properly.)

6 / Using a skewer or spoon (or both) dip each ball individually into the chocolate, covering completely (I half-dipped some just to try it out, that works too!). Place chocolate covered Oreo ball on clean baking sheet.

7 / While chocolate is still “wet” sprinkle your choice of sprinkles over the top.

Dude. DUDE. This is the easiest, quickest recipe, freakin' give it a try! A NO BAKE with 3 ingredients each (plus decor). Once you pop, you just won't stop, that's a promise.. and don't forget to print out the recipe card.
What other quick or no bake recipes do you make?
Funfetti!

Raise your hand if you don't LOVE funfetti cupcakes.... I see no one is raising their hand... good, so we are all on the same page. They're GREAT. Make you feel like a kid again. Make you smile. They're so damn cute! So why not give it a bake?

Makes 12 cupcakes in standard liners.
RECIPE BELOW - GET BAKING!
FOR THE BATTER /
1¼ cups flour
1½ tsp. baking powder
¼ tsp. salt
¾ cup sugar
6 tbsp. butter, room temperature
1 large egg + 1 egg white, room temperature
1 tsp. vanilla extract
½ cup half-and-half
2 tbsp. rainbow sprinkles (plus more for decorating!)
FOR THE FROSTING /
1½ cups (3 sticks) unsalted butter, room temperature
1 pound (4 cups) confectioners sugar, sifted
½ tsp. pure vanilla extract
FOR THE BATTER /
1 / Preheat oven to 350˚F. Line cupcake pan with paper liners.
2 / In a large bowl, sift flour, baking powder and salt. Set aside.
3 / In a stand mixer, beat the sugar and butter until well combined. Add egg and egg white, one at a time, beating on low. Add the vanilla.
4 / Gradually add flour mixture to butter mixture in 3 additions, alternating with half-and-half in 2 additions. Fold in rainbow sprinkles.
5 / Fill cupcake liners about ½ full. Bake for about 17-20 minutes or until a toothpick inserted in the middle comes out clean. Remove from pan and cool completely on a wire cooling rack before frosting. Frost with vanilla frosting (recipe below), and decorate with colored sprinkles!
FOR THE FROSTING /
1 / With an electric mixer on medium-high speed, beat butter until pale and creamy.
2 / Reduce speed to medium. Add the confectioners' sugar, ½ cup at a time, beating well after each addition and scraping down sides of bowl as needed. Frosting will be pale and fluffy.
3 / Add vanilla, and beat until frosting is smooth.

You can find the DIY for the decor I made here. I bought these adorable liners and sprinkles at Sur La Tab, but have seen similar liners ones at TJMaxx lately, so go looking! Download the recipe card for free for the Funfetti Cupcakes here!
These would be perfect for a baby shower, wedding shower, kids birthday or any other fun event! What are you going to make them for?
Key Lime Pie Cupcake Prints!

KEY LIME PIE! Yes, I said it... KEY LIME PIE in a CUPCAKE! Not only are they pretty, they are delicious!... and YOU can make them yourself!


This week, lets do a FREE DOWNLOAD on this recipe card! Click HERE to download the recipe card so you can print it out yourself! ENJOY!
Strawberry Shortcake Cupcake Prints!

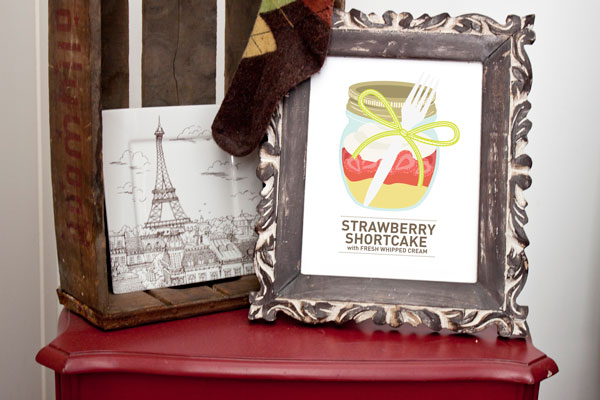
Strawberry Shortcake?! Say it is so! I don'y know about you, but when I was a kid, every cake I asked for, every celebration was topeed with STRAWBERRY SHORTCAKE, and now, we can make it ourselves! AND in a jar! YES WAY.


Visit my Etsy Store to get prints, recipe cards and get baking yourself! Blog readers enter code SWEETDEAL to get 25% off!
Mason Jar Cupcakes: Red Velvet

Mason Jar Cupcakes. Cute? YES! Bad idea?... Well, when I first got started, I thought so. I was a mess. My very small kitchen was a disaster, there was batter all over the edges of the jar (which turned brown a it baked!), I filled the jars without spraying them with baking spray, I filled them too much... but lucky for you, you get to learn from my mistakes! Below is the step by step to make these beautiful red velvet cupcakes in mason jars.

In the coming weeks as I bake and make other sweets and desserts, I will provide process images, including mistakes that were made, but for now here are some keys in baking in mason jars:
1 / Spray the jars! I did a test run before I started the real cupcakes, and although the cupcakes didn't stick much, they pop right out and are soooo much easier to eat when you spray the jar interior.
2 / Get a batter pen! During the first batch, I didn't plan ahead. I started pouring, tried using scoops and spoons, and even made a poor man's funnel (cut the top off a waterbottle and used that!). Mess. Mess. Mess. All over the sides! It took a while to wipe the interior wall clean. Get a batterpen, you'll thank me.
3 / Don't fill too much! I thought a standard ⅔ was going to work. Wrong. Only will the jar ¼ the way. Filling the jar only ¼ allows you to ice the cupcake and close the lid without messing anything up! Then you can freeze the cupcakes or transport them easily!
4 / You can freeze cupcakes?!? Did you know that? I did not! 75 cupcakes for a party was a big undertaking for a novice baker like myself, but I learned from a veteran baker that most cupcakes can be frozen in airtight containers (with or without icing) for up to 2 months! A jar is airtight! I baked 1 batch at a time, let them cool completely before covering, put the lids on real tight, then popped them in the freezer. Note: I did not frost until the night before the party, but you can! Remove the cupcakes the day before and allow them to come to room temperature for serving.
5 / Jars are not the same size as standard liners. There's nothing worse then running out of ingredients in the middle of making something. Yup, it happened to me. A standard recipe makes 12 cupcakes, but it is possible (depending on the size of your jars) that it will make less. I had to make more batches to reach my goal amount, and ran out of red food coloring. Not fun. Plan ahead, understand that more (or less) batches will be necessary.
RECIPE BELOW - GET BAKING!

Makes 24 Cupcakes in standard liners / Mason jar amount depends on size of jar
FOR THE BATTER
2½ cups cake flour (not self- rising), sifted
2 tbsp unsweetened Dutch-process cocoa powder
1 tsp salt
1½ cups sugar
1½ cups vegetable oil
2 large eggs, room temperature
2 tbsp red food coloring
1 tsp pure vanilla extract
1 cup buttermilk
1½ tsp baking soda
2 tsp distilled white vinegar
FOR THE FROSTING
2 (8-ounce packages) cream cheese, at room temperature
8 tbsp (1 stick) unsalted butter,at room temperature
2½ cups confectioners’ sugar, sifted
1 tsp vanilla extract
Pinch of salt
DIRECTIONS
1 / Preheat oven to 350 degrees. Line standard muffin tins with paper liners. Whisk together cake flour, cocoa, and salt.
2 / With an electric mixer on medium-high speed, whisk together sugar and oil until combined. Add eggs, one at a time, beating until each is incorporated, scraping down sides of bowl as needed. Mix in food color and vanilla.
3 / Reduce speed to low. Add flour mixture in three batches, alternating with two additions of buttermilk, and whisking well after each. Stir together the baking soda and vinegar in a small bowl (it will foam); add mixture to the batter, and mix on medium speed 10 seconds.
4 / Divide batter evenly among lined cups, filling each three-quarters full*. Bake, rotating tins halfway through, until a cake tester inserted in centers comes out clean, about 18-20 minutes. Transfer tins to wire racks to cool 10 minutes before removing cupcakes.

FOR THE FROSTING
1 / Beat cream cheese and butter at medium speed until smooth, about 1 minute. (a stand mixer with paddle attachment would be best but not necessary).
2 / Add sugar, vanilla, and salt. Blend on low speed for 30 seconds; beat on medium high until fluffy.
3 / When cupcakes are cooled completely, frost with cream cheese frosting.

* FOR MASON JARS / Spray jars VERY well. Fill jars ¼ way full. Use a batter pen or funnel to ensure no batter gets on sides of jar. If batter gets on the sides of the jar, use a wet paper towel to wipe clean. Baking with batter on interior sides of jar will cause jar to brown. Do not bake with lids on! Jars vary, be sure to check frequently. Bake, rotating tins halfway through, until a cake tester inserted in centers comes out clean, about 18-20 minutes.
Cupcakes can be stored overnight at room temperature, or frozen up to 2 months, in airtight containers. Bring to room temperature before serving.

What do you think? Going to give it a try? Let me know if I missed anything, if you have any questions that aren't answered or if there's a recipe you'd like me to try out!