DIY Wire Knot Ring
I love to shop. There, I said it. You DO NOT want to go shopping with me. You know how you're in a store, with your best pal, and you ask, "Should I get this?"... well my friends, my answer will almost always be YES (unless of course its awful!). Tell me you don't have the money, I'll tell you to charge it.
Lately, I have been trying to cut down the spending and take a real look at things to figure out if we can make them.
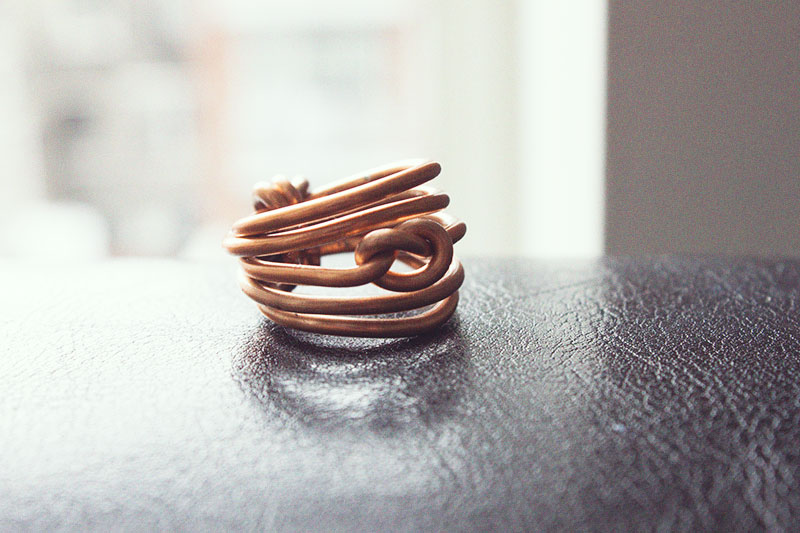
A while back I saw this lovely piece on Uncovet. Upon more research, I found the designers Etsy Store, which has some great stuff, but I got to thinking, we have to be able to make her, right? Instead of making six separate rings, lets make one that achieves the same look!
GATHER THE SUPPLIES /
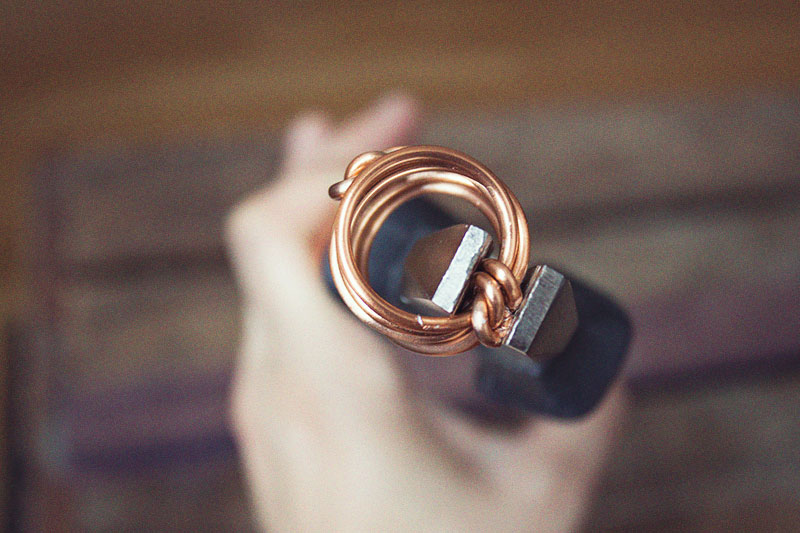
Copper 12 gauge wire (3 yards for $5, can't beat it!) / Jewelry Pliers / Large Pliers (you may be able to do it without both, give it a try!) / a string & pen (to measure your finger) / a ruler (to measure the wire) / and that last wood item pictured above is actually my potato smasher! You will need a handle of some sort that is the same circumference of your finger (we make it work here!)
Let's get started!
Wrap the string around the finger you want to make the ring for, loosely- to finish the end of the ring you will need a litttttttle bit of extra space- mark it with a pen.
Find something, anything, in your house that measures the same circumference as your finger! Set it aside.
Measure out your wire and cut the piece. I needed about 18 inches of wire for my index finger. Better to measure it a bit too big, you can always snip off the end when you're done.
This is the hardest part, so get your muscles warmed up! In the center of your wire, tie a knot. I know, seems easy, but you're really going to have to yank on each end to make the knot get good and small. PULL, PULL, PULL! Check the size of the knot by placing on your finger. Like the way it looks, move on. If not, keep yanking until you get it right!
Place the knot on the front of the "tool" you chose with the same circumference as your finger.
Wrap the ends of the wire around the back and back around. The wire is easier to work with than you would think, just take your time and make a smooth curve. Don't make it super tight, like I said above, you need a bit of room to finish it off!
Wrap twice above the knot and twice below.
Push the rings of wire in towards the knot.. It will fight with you, but fight back, you're the boss here! It will be secured shortly, don't you worry yourself here!
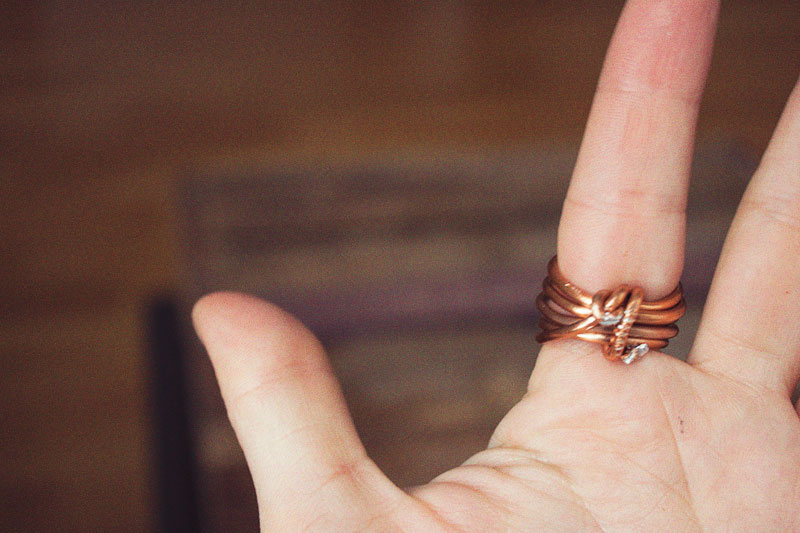
Before you secure the wire, lets make sure it fits, duh!
Wrap the edges of the wire around the back of the ring like shown above. Make sure the very tip of the wire faces away from your finger so you don't get any ouchies.
This is what will keep the loops secure, so make sure you make this nice and tight!
This is why I said you needed a bit of extra room, see, I wouldn't point you in the wrong direction!
With your lage pliers, give the back knot a reallllllllly good squeeze. Then do it again. And maybe again. You want to apply tons of pressure here so that you flatten the wire a bit, which secures it, and makes it less clunky on your finger!
Alright, yes, I beat mine up a little in the squeezing process, but it's the back, and it fits perfectly, so I'm ok with that. You may want to learn from my mistake and wrap it in fabric or something soft to avoid the wear.
Simple and gorgeous and all by yourself! For $5 you get enough wire to make 6 rings if you are using 18 inches for each. CAN'T BEAT THAT!
I wore it and already have so many people giving me compliments and asking me to make them one! Yay! Success.
Who will you make one for? (I bet you'll you keep them all for yourself!)


