DIY / Wood Cube Necklace

I've seen some really cute large beaded necklaces lately, but things are expensive, and I don't know 'bout you, but I could really use some ways to save some cash-money.

For this jem I only had to purchase the leather string ($5, can make 2 necklaces) and 1-inch wood cubes ($5 for a 12 pack, can make 4 necklaces). You can find some here if you can't find them in your local stores.

The main items you need are: drill (if you can't find blocks with pre-drilled holes), plier/wire cutter, wire hanger, painters tape, leather string (or any string you would want to use, can even be ribbon!), ruler or tape measure and I sketched out how I wanted to paint the cubes in advance. Don't have a tool kit, why not?! You don't need a manly, expensive, cray-cray one... I got my lovely little helpers at Ikea. Here is the basic kit, only $7.99! I also got my drill there, and I have used it so many times it was so worth it, get it here for only $24.99. Get on it!

I used some white paint, gold spray paint and wood stain I had in the house from other projects. You can use any paints or stains you may have in your home, which is a great money saver instead of going out and buying more. Nail polish remover helps remove the spray paint if it seeps under the tape.

Measure where you want to drill the holes on all 3 cubes. Mine are just above the half way mark. Drill a hole straight through in all 3 cubes.

Cut a piece of the wire hanger so it is 3-inches wide (to accommodate all 3 blocks) plus about 2-inches more to loop the two ends of the wire.

Tape off the areas you want to paint based on your sketch and apply the paint or stain.

Allow to dry completely then tape off the dry area so you can paint the non-painted part of the cube the color of your choosing. My stain bled a bit, but thats ok, we ain't perfect, but we can just paint over it!
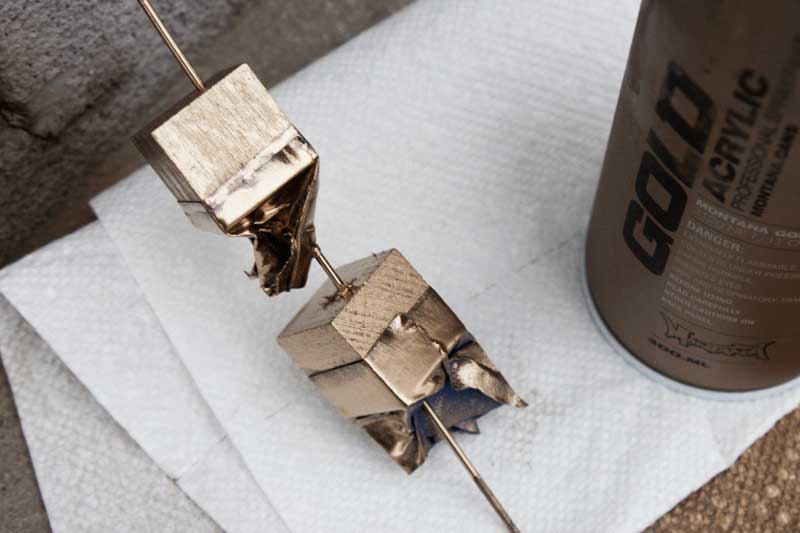
I save the spray paint part until the second painting step because then I could just put them on a piece of wire and take 'em outside and do them at one time. Spray away!

Using the pliers (wire cutters) loop one end of the wire you cut, arrange the 3 cubes as you like, then loop the other end, trying to make it as tight as possible so the blocks don't get crazy and slide around. You could also use a bit of glue if you want them to stay in place. I wanted mine to spin a bit so I didn't glue them, but I didn't leave much wiggle room.

I wanted a sliding knot to I can adjust the necklace length. Follow these directions on how to do this, she explains it so well! I ain't-gonna-lie, it took me a few (read 5 or more) times to get it right. It's ok, don't get frustrated, you can do it!

...aaaaaannnnnndddd done! Easy-peasy, and so cute for only a couple-dollas!