
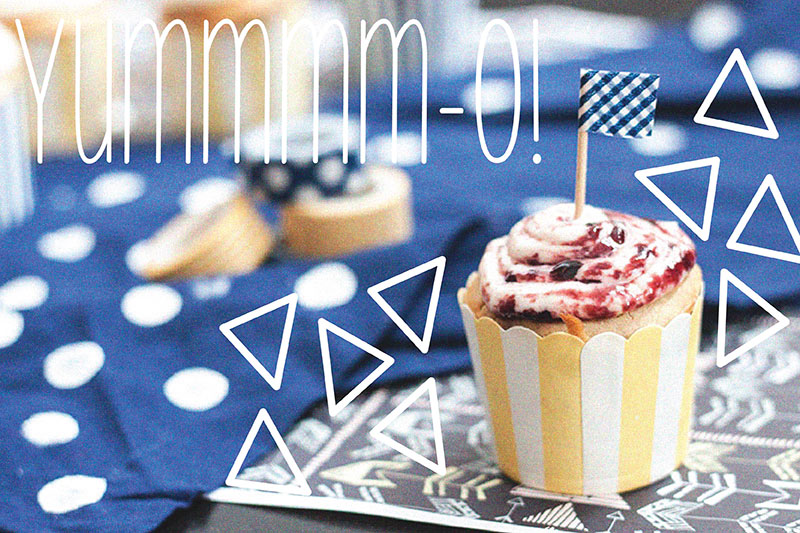
Roasted Blueberry & Lemon Cupcake w. Cream Cheese & Blueberry Jam

Who doesn't freakin' love blueberry, raise your hand... I don't see any hands raised so I'm going to go with NO BODY. I mean, not only are they BEAUTIFUL IN COLOR but they are tasty as can be! Baked, they get even better.
When I was trying to decide on what recipe to use for my AltSummit card, I struggled, hard. I LOVED the Pineapple-Upside-Down cupcake we did a few weeks ago, and I had thought that it would be so versatile. WRONG.
Here's the issue. Yes. It was a fantastic cake. Yes, I want to eat it ALLLLLL THE TIME. BUTTTTT because the batter is so loose, the roasted blueberries sank to the bottom, which made for a problem scenario. The blueberries sunk (and I might have to admit that I used a MASSIVE AMOUNT OF BLUEBERRIES so it took up half the liner when they sunk- oopsies) and the cupcake just couldn't bake properly. So, lesson learned, loose batters are NOT ideal for adding fruit. You're welcome. (They were VERY tasty, but they overflowed funny, and looks all cray-cray so there was NO WAY I could use it for my AltSummit recipe!)
OK MOVING ON! Second try on this, and we have a winner! I scraped the idea of reusing the other batter and it worked out just fine!
CLICK HERE FOR THE FREE DOWNLOADABLE RECIPE CARD.
Yields 12 Cupcakes in a standard cupcake pan

FOR THE BATTER /
1 ⅓ cup flour
3 tbsp. corn starch
¼ tsp. baking soda
1 tsp. baking powder
½ tsp. salt
1 tsp. cinnamon
1 stick unsalted butter, room temperature
⅓ cup sugar
2 eggs, room temperature
1 tsp. vanilla
¾ cup vanilla yogurt
1 ¼ cup fresh blueberries
Zest of ½ a lemon

1 / Preheat oven to 375˚. Line a standard cupcake pan with 12 liners.
2 / Destem and clean the blueberries. Lay blueberries out on a cake or cookie pan (with sides). Place on center rack of the oven and cook for 10 minutes, or until blueberries start to burst. Remove from oven and allow to come to room temperature.

3 / Sift together the flour, cornstarch, baking soda, baking powder, salt and cinnamon. Set aside.
4 / Beat together the butter and sugar until light and fluffy, then beat in eggs.
5 / Mix the vanilla into the yogurt.
6 / Alternating between the dry ingredients and the yogurt, beat the ingredients into the butter mixture until well combined.
7 / Zest half a lemon and fold into the batter.

8 / Gently fold in the roasted blueberries.

9 / Fill the cupcake liners evenly, ⅔ the way full. Bake for 21-25 minutes, or until a cupcake tester inserted in the center comes out clean and the edges of the cupcake are golden brown.

FOR THE FROSTING /
1 stick butter, room temperature
8 oz. container of cream cheese
½ tsp. vanilla
2 ⅔ cup confectioners’ sugar
¼ cup blueberry jam

1 / Beat together the butter and cream cheese. *Guys, I've been into using the round container of cream cheese instead of bars lately, I feel like they get a creamier frosting, I may never go back!
2 / Add the vanilla.
3 / Slowly, in 3 parts, beat in the confectioners sugar until there are no lumps and the consistency is even.
4 / To swirl the frosting and jam, add a large spoon-full of blueberry jam to the center of the bowl of cream cheese frosting. Do not mix the jam with the frosting. (Just like we did with the lemon poppyseed cupcakes a while back.)
5 / Spoon the frosting (with the jam in it) into a frosting bag and pipe as normal. The jam and frosting will swirl naturally!

You can see the washi tape flags getting all ready to jazz up the place.
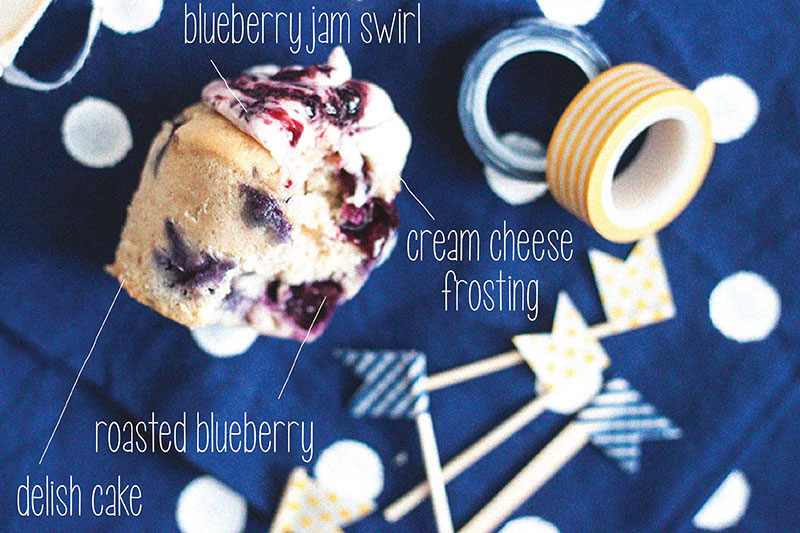
I don't ever need an excuse to eat a cupcake, but I have to say, these would make a lovely breakfast treat! By roasting the blueberries before we folded them into the batter we are bringing out an extra bit of sweetness and flavor, which sets them apart form any other blueberry cupcake I have eaten.
I hope some of my fellow Alt attendees with give it a try and send me some pics! I think next time, I'd add some brown sugar topping, what do you think?

DIY / Washi Cupcake Flag
Hello all! It has been a while since we talked DIY, but I've got a super simple one for your this week.
This post is part of a MUCH larger project I am working on, I will be sharing all the parts along the way and then the completed project (keep your fingers crossed I get them all done in time and that it works like I am imagining it! ).
Any-whoozer, cupcake Washi Tape Flags. Soooo simple and sooooo perfect in so many ways!
Washi tape is so versatile, I'm excited to start working with it, the possibilites are ENDLESS!
Sometimes you want to add a little pazazz to your baked goods, but don't want to invest in a whole decor kit, or want it to be more personal. Maybe you want pink polka dots, and you can't find pink polka dot decor anywhere. Enter washi tape. You can get soooo many different patterns and colors online it is incredible!
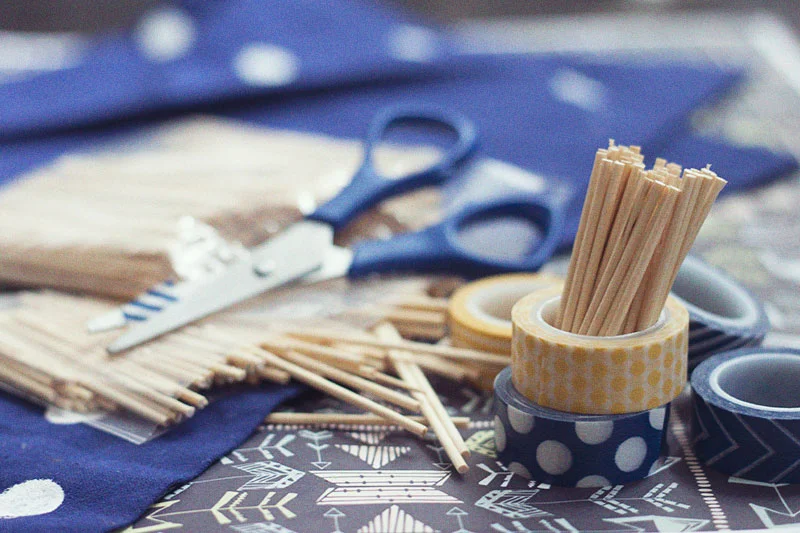
So here we go. Grab some washi tape in your fave color or pattern, some small wood dowels (or toothpicks even) and scissors and you're ready to go. The ones I made are for an upcoming recipe, Blueberry and Lemon Cupcakes so i went with blue and yellow, duh!

1 / "Measure" out the amount of tape you want. A simple way to do this is using the tools you are equip with already, YOUR FINGERS! Stretch the tape across two fingers, and cut.

2 / Place the dowel or toothpick in the center of your cut tape.

3 / Wrap around and press closed. It's tape, so it self-seals! Washi tape is transparant, so you will see some of the other side, which looks great with this pattern! That's it!

I have to make a ton of these, but it is so simple that I don't mind!

I had some striped yellow and blue liners in the house, which was a perfect fit! These are so freakin' adorable, I am going to have to buy up some more tape for future projects!

Mint Lemonade Cupcake w. Lemon Curd & Lemon Frosting

So far we did PMS 230- Chocolate Raspberry Cheesecake, and PMS 366- Tiered Pistachio and they looked and tasted AMAZINGGGG! SO WHATS LEFT? Clearly, yellow needed to be incorporated into this palette. The last and final Spring Cupcake in the Pantone series here is a MINT LEMONADE filled with LEMON CURD. Boom. PMS 100. Nailed it.

I had never made Lemon curd before (ok, I'll be honest, I had never EATEN lemon curd before) so I gave it a shot and I am so happy I did. The mint and the lemon curd go perfectly together. The frosting is super light and creamy, and compliments the flavors and textures like WHOA.
CLICK HERE FOR THE FREE DOWNLOADABLE RECIPE CARD.
Yields 12 Cupcakes in standard liners

FOR THE BATTER/
1¼ cups all-purpose flour
¾ cup sugar
½ tsp. baking soda
½ tsp. salt
1 stick butter
½ cup milk
1 egg
½ tsp. white vinegar
½ tsp. vanilla extract
zest of one lemon plus some juice
1 medium bushel of mint

1 / To make the mint-infused butter, heat 1 stick butter, milk and mint over a double boiler. Once butter is melted, turn heat down and let sit for 15 minutes.

Turn heat off and let sit another 15 minutes. Press through a sieve to remove mint leaves and let cool to room temperature

2 / Preheat oven to 325˚F. Line a cupcake pan with 12 cupcake liners and set aside.
3 / In a medium bowl, combine flour, sugar, baking soda and salt.
4 / In a separate bowl, whisk together milk, egg, vinegar, vanilla extract and lemon zest.
5 / Add the wet ingredients to the dry ingredients. Whisk on medium speed until just combined.
6 / Lightly squeeze the lemon (that was zested) to add a bit of the fresh lemon juice, to taste.

7 / Spoon the mixture into liners filling ⅔ the way.

Bake for 18-22 minutes or until toothpick inserted into the center of the cupcake comes out clean. Allow cupcakes to cool completely before assembling.

FOR THE LEMON CURD /
6 large egg yolks
Zest of 1 lemon
½ cup lemon juice
12 tbsp. sugar
8 tbsp. unsalted butter, cold, cut into pieces

1 / Combine yolks, lemon zest, lemon juice, and sugar in a small saucepan. Whisk to combine.
2 / Set over medium heat, and stir constantly with a wooden spoon, making sure to stir sides and bottom of pan. Cook until mixture is thick enough to coat back of wooden spoon, 5 to 7 minutes.

3 / Remove saucepan from heat. Add butter, one piece at a time, stirring with the wooden spoon until consistency is smooth.
4 / Transfer mixture to a medium bowl. Lay a sheet of plastic wrap directly on the surface of the curd to avoid a skin from forming; wrap tightly. Let cool; refrigerate until firm and chilled, at least 1 hour.

FOR THE FROSTING /
8 oz. package cream cheese, softened
½ stick butter, softened
3 cups confectioners sugar
1 tsp. vanilla extract
juice of one lemon

1 / Using a mixer, blend the butter and cream cheese together until well combined.
2 / Gradually add in the confectioners’ sugar until fully incorporated.
3 / Finally mix in vanilla and lemon juice.

ASSEMBLY /
Lemon Curd
Cooled Cupcakes
Frosting
Candy Lemon Wedges
Paper Straws
Cupcake corer (or knife)
Piping bags (for curd and frosting) and tip of your choice!

1 / Using a cupcake corer or knife, core the center of the cooled cupcakes out.

2 / Fill a piping bag with the cooled lemon curd.
3 / Fill the cored cupcake with the lemon curd.

4 / Pipe the frosting on the top of the cupcake with your favorite tip!

5 / (Optional) Garnish with lemon candies and adorable paper straws!

I LOVE HOW THESE CAME OUT. THEY ARE JUST FREAKIN' ADORABLE.
The color and decor of these is so spring and fresh and wonderful and beautiful and and anddddd..... I AM OBSESSED. I really thought that I needed to incorporate a "drink" cupcake into the spring cupcake mix, and what says spring like LEMONADE.
So what do you think of the whole collection? Are there any other spring cupcakes you would have mixed in here?

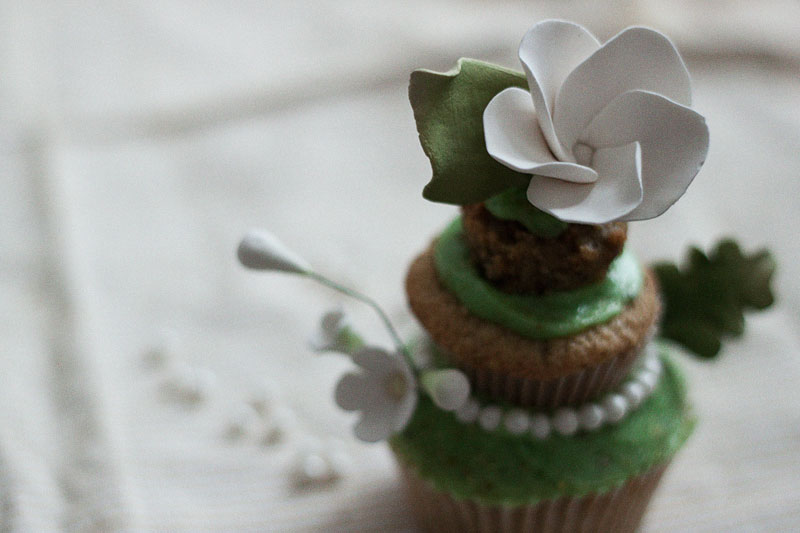
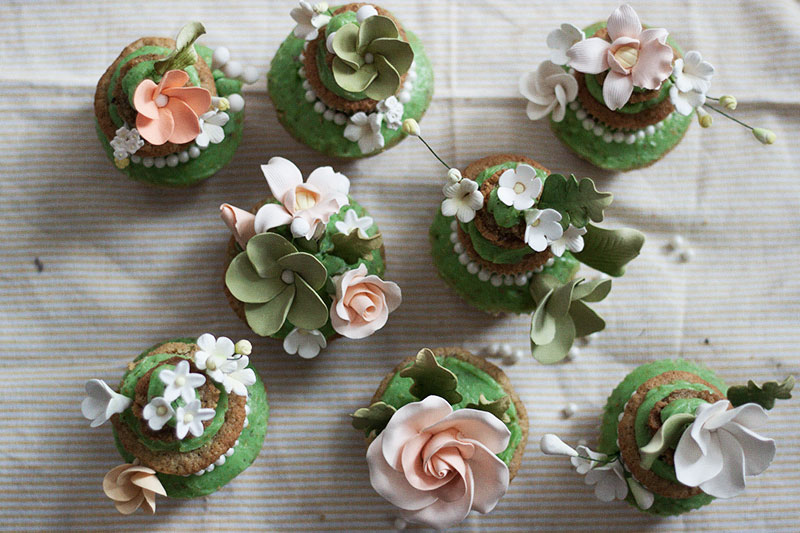
Tiered Spring Pistachio Cupcake w. Pistachio Frosting

Numero Dos in our Spring Cupcakes inspired by Pantone colors! Nothing says spring like green. These April showers bring May flowers for sure. The trees are blooming. The lawns are growing. Flowers EVERYWHERE. It's a lovely time here in NYC.
For this collection of cupcakes, I didn't just want to push myself in the flavor department, I wanted to see what I could do to blow my clients mind with decore as well, and I think I nailed it. For the Raspberry Chocolate Cheesecake cupcake from last week, we experimented with piping CHEESECAKE as roses, but I was in NY Cake and saw some amazing gum paste flowers THAT I JUST NEEDED TO HAVE.

PMS 366, I adore you. These tiered cupcakes really kicked my butt, but they came out incredible. The recipe is SUPER easy, but applying all the edible pearls and flowers was really intricate and tried my last nerve! I added almond extract to elevate the nutty flavor, and I think it was a perfect choice!
These darlings did cave a bit, but don't fear, they are still amazing and you can just cover it with frosting!
CLICK HERE FOR THE FREE DOWNLOADABLE RECIPE CARD.
Yields 12 Cupcakes in standard liners or 6 tiered cupcakes (plus 2 standard and a few babies)

I mean, c'mon, have you ever seen such beauty in something EDIBLE!?

FOR THE BATTER /
½ cup pistachios
¾ cup sugar
2 tsp baking powder
½ cup butter plus 2 tbsp.
1 cup flour
⅓ cup milk

1 / Heat oven to 300˚F and line a standard cupcake pan with liners*.
2 / Put pistachios into a food processor with ½ cup sugar. Pulse until very finely chopped.
3 / In a large bowl beat the, remaining sugar, butter, eggs, flour and milk with an electric mixer until smooth.

4 / Divide the batter between cavities and bake on 22-25 minutes or until a skewer poked in comes out clean. Cool on a wire rack.

FOR THE FROSTING /
1 ½ cups unsalted butter, at room temperature
1 cup confectioners’ sugar
⅓ cup finely ground pistachios
1 tsp. salt
1 tsp. almond extract

1 / Beat the room temperature butter and confectioners’ sugar in the bowl on medium-high speed for 2-3 minutes, or until fluffy and pale yellow.
2 / Add the ground pistachios, salt and almond extract and beat for an additional 2-3 minutes. If you would like to color the frosting the way I did, add tiny drops of green food coloring while beating until you reach the desired shade!

ASSEMBLY /
1 / Allow cupcakes to cool completely and pipe the prepared forsting on teh cupcake with your favorite tip!*
* If you would like to create tiered cupcakes like I did, you will need cupcake pan sizes. I used standard and 2 smaller sizes. This recipe yielded about 6 tiered cupcakes, and an extra 3 standard cupcakes. (Of course plus a few more super-minis that I nibbled on!)To tier the cupcakes, I smear the frosting on every size cupcake. Then stack the mid-sized one on top. I did not remove the liner, but you can. Then (obviously) add the smallest cupcake to the top. I actually didn’t have liners for the teenie-tiny cupcakes, so they don’t have liners on them.

THESE FLOWERS! THESE. FLOWERSSSSSS! OMGEEEE are they not INCREDIBLE?! Yes, they were a bit more pricy then the typical decore we use on this blog, but it was for an important event and I wanted to WOW the PANTS OFF the crowd (mission accomplished!)!!!

I AM OBSESSED WITH THIS LARGE ROSE. It was a perfect fit for the standard cupcakes that were left.
If you want to see how all of the beauties turned out, check out the gallery below (and by "if you want to" I mean FREAKIN 'CHECK OUT MY HARD WORK, THEY LOOK AMAZE-BALLS.
Dont forget to download your free recipe card for keeps!
Can you think of any other ideas for spring cupcakes I missed? We have one more coming next week, can you guess what I went with?


PMS 230 / Chocolate Cupcake w. Graham Cracker Crust & Raspberry Cheesecake

Sorry it has been so long since a post, but this one is totally worth the wait. Chocolate, Graham Cracker. Raspberry Cheesecake. In. A. Cupcake. Yum.O.
I was hired to created Spring inspired cupcakes, and some may say I went a little crazy. I imagined up three types, inspired by three Pantone colors, with three different types of decor. Yes, some say I’m cray, but I’m ok with that.

Although they were for spring, a chocolate cupcake was necessary for the bunch, I can’t disappoint my people! So I got to thinking, what can make it “spring”... well the icing color of course! BUT I didn’t want to just dye the icing, that is what I call cheating! So I had to think up something. Hmmm, what goes good with chocolate, well, raspberry of course! BUT let’s take it up one more notch, and make it RASPBERRY CHEESECAKE. BOOM. NAILED. IT. PMS 230 in a cupcake, here we go!
CLICK HERE FOR THE FREE DOWNLOADABLE RECIPE CARD.
Yields 12 Cupcakes in standard liners (you'll have extra cheesecake though!)

FOR THE RASPBERRY CHEESECAKE /
½ cup sugar + 2 tbsp. (for raspberries)
1 pound cream cheese, softened
½ tsp. vanilla extract
2 large eggs, lightly beaten
½ cup sour cream
Pinch of sea salt
¾ cup raspberry

LOOOOOOOOK AT THOSE BEAUTSSSSS!
1 / Preheat oven to 275˚F.
2 / Process raspberries in a food processor until smooth, about 30 seconds. Pass puree through a fine sieve into a small bowl; discard solids. Whisk in 2 tbsp. sugar, and set aside.
3 / Beat cream cheese with a mixer on medium speed until smooth.
4 / Add sugar, then vanilla until well combined.
5 / Add eggs, scraping down side of bowl as necessary. Add sour cream and salt. Pour batter into spring form if you have, if not, any pan (I used a 9 inch glass) will do, because it doesn’t matter if the cake stays together, you will need to ruin it anyway!
6 / Bake until sides are set but centers are wobbly, about 45 minutes. Refrigerate 4 hours or overnight.
FOR THE CRUST /
¾ cup graham cracker crumbs (about 8 full graham crackers)
2 tbsp. sugar
3 tbsp. unsalted butter, melted
1 / Stir together the graham cracker crumbs, sugar and melted butter until well combined.

2 / Press 1 tbsp. of the mixture into the bottom of each cupcake liner.

FOR THE CUPCAKE BATTER /
1 stick unsalted butter, cut into 4 pieces
2 oz. bittersweet chocolate, chopped
½ cup Dutch-processed cocoa powder
¾ cup all-purpose flour
½ tsp. baking soda
¾ tsp. baking powder
2 eggs
¾ cup granulated sugar
1 tsp. vanilla extract
½ tsp. salt
½ cup sour cream

1 / Preheat oven to 350˚F.
2 / Combine butter, chocolate, and cocoa in medium heatproof bowl. Set bowl over saucepan containing barely simmering water; heat mixture until butter and chocolate are melted and whisk until smooth and combined. Set aside to cool until just warm to the touch.

3 / Whisk flour, baking soda, and baking powder in small bowl to combine.
4 / Whisk eggs in second medium bowl to combine; add sugar, vanilla, and salt until fully incorporated. Add cooled chocolate mixture and whisk until combined. Sift about one-third of flour mixture over chocolate mixture and whisk until combined; whisk in sour cream until combined, then sift remaining flour mixture over.
Whisk until batter is homogeneous and thick.

5 / Divide batter evenly among the graham cracker crust cupcake liners, filling each three-quarters full. Bake until skewer inserted into center of cupcakes comes out clean, 18 to 20 minutes.

6 / Cool completely on a wire rack.

ASSEMBLY /
1 / Using a cupcake corer or knife, core the center of the cooled cupcakes out.
2 / Fill a piping bag with the cooled, set cheesecake*. If the cheesecake is thick and you think it won’t pipe properly, using an electric mixer beat it for about 2 minutes to get a better consistency.
3 / Fill the cored cupcake with the cheesecake and then pipe on the top of the cupcake with your favorite tip!
* As you see, I attempted some roses. They all came out a little different!
First I attempted this one. I dropped some food coloring along the seam as instructed. I was doing well, but I didn’t let my cheesecake set long enough, so it was a bit loose. Also, I needed to refill my bag, so I wasn’t able to add the food coloring along the seam again, because it was a mess!

This video even though it isn’t in English shows how you can do a rose also!

I wound up just circling around the cupcake, starting in the center, on many of them, and they were cute too!

So if you have a super special occasion, you should make these. I understand that the cheesecake adds a whole extra element (and a ton more dirty dishes) but take my word for it, you will put a smile on everyones face!
Don't forget to download your free recipe card for keeps!
Have you experimented with unconventional icings? I tried pumpkin pie (link) a while ago, and it was a crowd favorite, what else can we cook up?

Zucchini Cupcake w. Sweet Brown Butter Glaze

I have seen and heard of zucchini cupcakes, but never tried one. Whats the catch here? Veggies IN A CUPCAKE? Why? WHYYYY? Whats the hype about? I needed to give it a try for myself. Rather than wing this one, I looked around the interwebs for a good base, and when I am looking for a recipe that is tried and tested, I always turn to my gurl, Martha.
I added some additional spices, and made some substitutions and loved what the outcome was. The almond extract added a bit of depth to the flavor, in addition to the cloves, ginger and nutmeg. I did leave out the nuts, but thats was only because we recently made a nut cupcake and I had enough.
In other news, I have a new lens for my camera! I had been working with the lens my kit came with. I have a Canon T1i, with a 18-55mm f/3.5-5.6 IS lens, but it was time for an upgrade. I've been shooting with it for far too long, but couldn't make a decision on what to buy! Luckily, I have some wonderful friends... and mah boy Vince "lent" me one. I am now feeling proper (and a little pimp actually) as I shoot with this beaut. I am still getting used to it, but am excited to see the quality of my images improve. ALSOOOOOOO I tend to only bake during peak day light, which I will continue to do but, this lens should allow me to shoot in less then ideal lighting situations, so maybe I can start midnight baking (sorry roommates, love you!).

Yields 12 Cupcakes in Standard liners
RECIPE BELOW, GET BAKING!

FOR THE BATTER /
1 ½ cup flour
1 cup brown sugar
2 tsp. baking powder
1 tsp. cinnamon
½ tsp. nutmeg
½ tsp. ginger
¼ tsp. cloves
½ tsp. salt
1 ½ cup coarsely grated zucchini (Chopping the zucchini in a food processor will get a great consistency)
⅓ cup vegetable oil
2 large eggs
½ tsp. almond extract

1 / Preheat oven to 350˚F and line a standard 12-cup cupcake pan with liners.
2 / In a large bowl, combine all of the dry ingredients. Whisk well to make sure completely incorporated with each other.

3 / In a medium bowl, combine the zucchini, oil, eggs and almond extract.
4 / Add the wet ingredients to the dry ingredients and beat on medium until just combined.

5 / Evenly distribute the batter between the prepared cupcake tray, filling each cavity ⅔ the way.

6 / Bake for 17-20 minutes or until a toothpick inserted into the center of the cupcake comes out clean.
Marthas recipe said to bake for 40 minutes, so that's what I set my timer for, but I just had this GUT FEELING that they were done at around 18 minutes. OMGEEEE am I glad I checked. They were perfect, maybe could have used a minute less actually. Keep an eye on them while the are baking, but DO NOT under ANY CIRCUMSTANCES open you oven up too much. When you open an oven while cupcakes are baking, you release the heat, and can cause disastrous results, like the cupcakes just completely collapsing. Wait until AT LEAST 15 minutes to check these, but if you can, just switch the oven light on and take a peek (without opening the oven) until you are pretty sure they have finished rising.
FOR THE GLAZE /
1 stick unsalted butter
2 cups sifted confectioners sugar
2 tsp. almond extract (vanilla extract pictured above, which will also work, but I made a game time decision and went with teh almond instead)
1-4 tbsp. milk

1 / In a small saucepan, melt butter over medium-high heat until nut-brown in color, about 10 minutes.
2 / Pour butter into a bowl, leaving any burned sediment behind.
3 / Add sugar, vanilla, and 1 tbsp. milk and stir until smooth. Let cool 5 minutes and then spread or our over cupcakes.

If the consistency of the icing is too thick to spread, add the remaining milk, 1 tbsp. at a time until the icing is spreadable.
So the discovery about zucchini cupcakes you ask? They are moist and amazing. They DO NOT taste like zucchini, but are a beautiful base for other spices and flavors. I actually think it would be really interesting to add some citrus flavors, or even make a chocolate one. The juice of the grated zucchini must be the trick!
They baked to a beautiful burnt orange color. I slathered them pretty good in the brown butter glaze, which is super sweet and perfection.
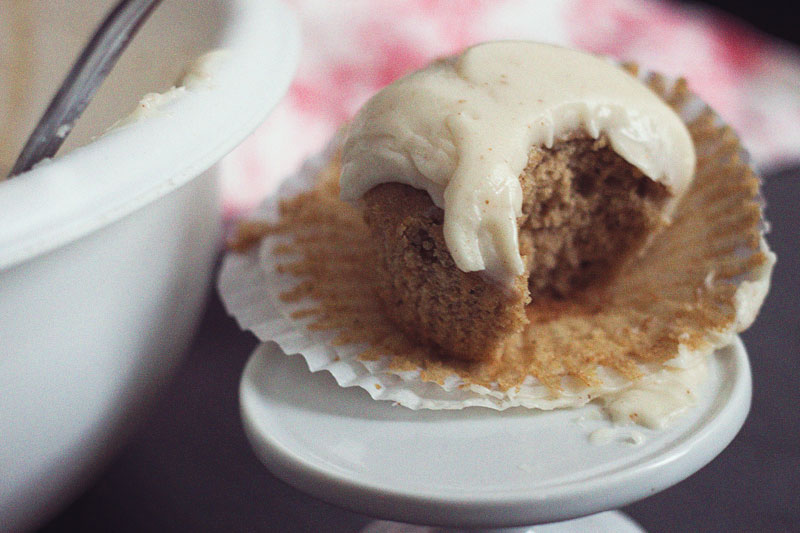
Take a big 'ol bite, you won't regret it!

OH ONE LAST THING I WANTED TO SHARE. LIsten up, baking is messy. Blogging is messy, its not all fun and games ya know, it's dishes and running to the store because you forgot to grab an ingredient and messes and more messes, but I love (almost) every second of it. Don't get discouraged that all the bloggers out there have beautiful pictures and beautiful lives, we also have this, we are human you know!
What does your kitchen look like when you get cooking (please tell me its not immaculate...)?

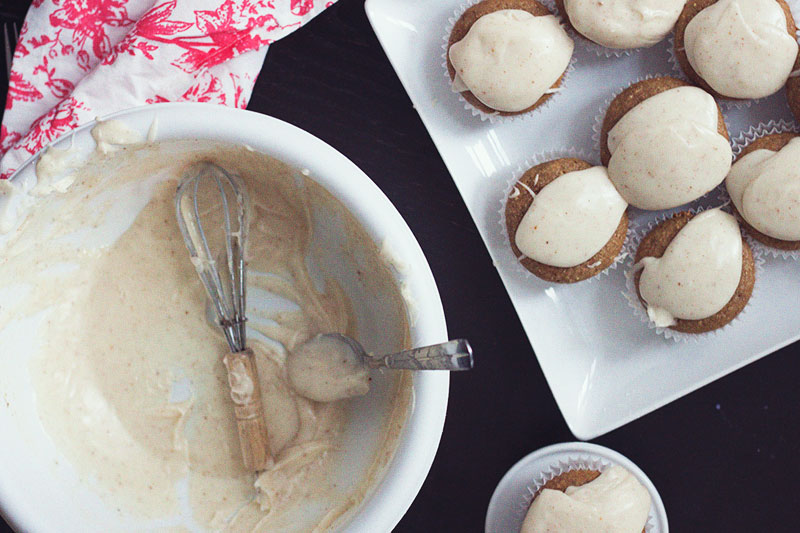
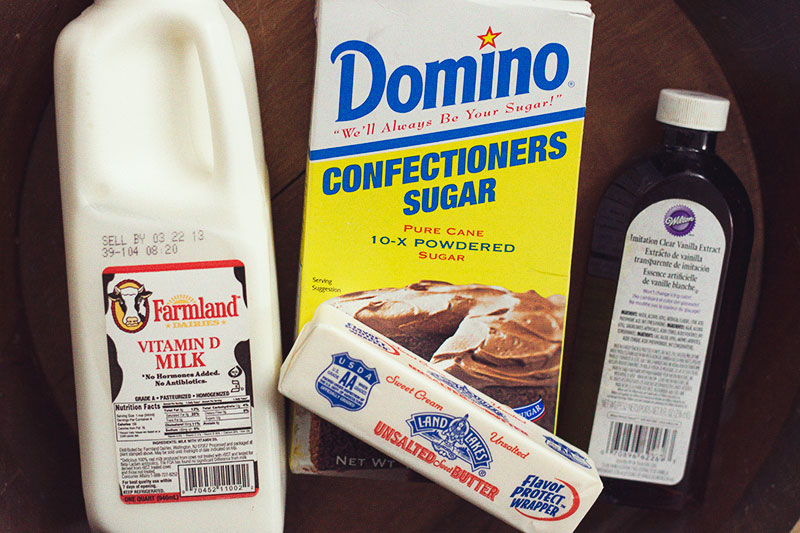
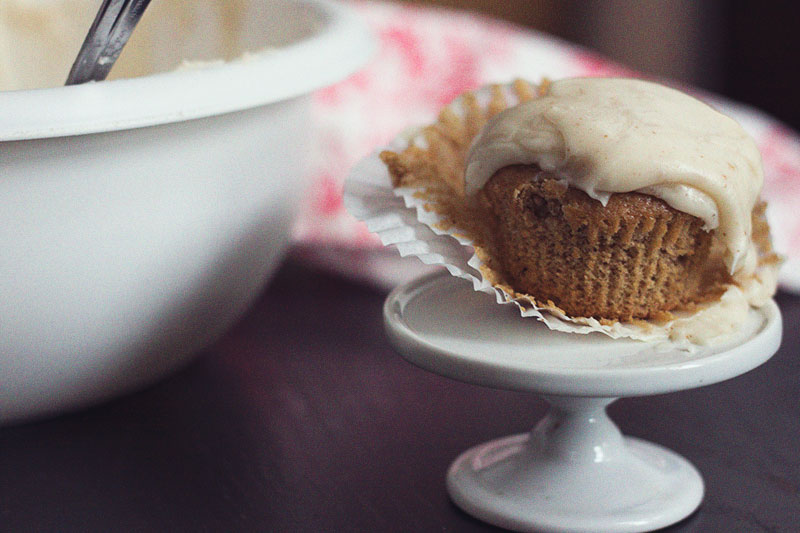
One Bowl Banana Nut Cupcake w. Honey Cinnamon Buttercream

It has been a few weeks since I posted a cupcake, which is so unlike me! I decided to be inspired by what was in the house this week, rather than thinking something up, having to drag my butt to the store and spend monies, when I have so many ingredients here! So... what did we have you ask... nuts, bananas and more nuts.
Can't be bad, right? This recipe is full of nutty-goodness. Using ripe bananas, and lots 'o nits, I would even say that maybe this could be a breakfast cupcake? (What the hell, we are adults, we can have whatever we want for breakfast, can I get an AMEN!)

Click here or on the image above for the free downloadable recipe card.
Recipe with images below...
GET BAKING!
Yields 18-20 cupcakes in standard liners

FOR THE BATTER /
1 ½ cup flour
¾ cup sugar
1 tsp. baking powder
1 ½ tsp. baking soda
¼ tsp. salt
½ cup butter (melted)
4 large ripe bananas (sliced)
2 large eggs
½ tsp. almond extract
2 cups mixed nuts (I had in the house walnuts, hazelnuts, pignoli and slivered almonds)

1 / Preheat oven to 350˚F and line cupcake standard cupcake pans with liners (will yield 20 cupcakes).
2 / Spray a baking sheet with baking spray and spread the nuts (chop them first if they are whole) on the sheet. Bake for 7 minutes and then with a spatula flip the nuts over and bake for an additional 5 minutes. Remove from oven and set aside to cool.

3 / In a large bowl whisk together all of the dry ingredients.
4 / Clear a “well” in the middle of the dry ingredients. In the center of the bowl drop in the bananas, eggs and almond extract.
5 / With a hand mixer (or stand mixer) beat on med-high until completely incorporated.
6 / Fold the cooled toasted nuts into the batter.

7 / Evenly distribute the batter amongst the prepared cupcake pan, filling each cavity ⅔ the way full.

8 / Bake for 15-18 minutes or until toothpick inserted in the center of the cupcake comes out clean.
* I would usually tell you to let them cool completely before frosting, but I have to say, I kept ‘em warm and frosted them and the buttery goodness melted on the nutty goodness and oh my goodness they were good, so its up to you, warm or cool (or both?).

FOR THE FROSTING /
1 cup butter, softened
1 cup powdered sugar
1 tbsp. honey
½ tbsp. cinnamon

1 / With an electric mixer, cream the butter until light and fluffy. (I know, I know, based on the image above, I didn't follow my instructions but you know what?!... YOU SHOULD! - Not only did I make a complete mess of my kitchen, my consistency was off and you should learn from my mistakes and to it the right way - I was being freakin' lazy.)
2 / Beat in the powdered sugar until well combined.
3 / Add the honey and cinnamon and beat until just combined.
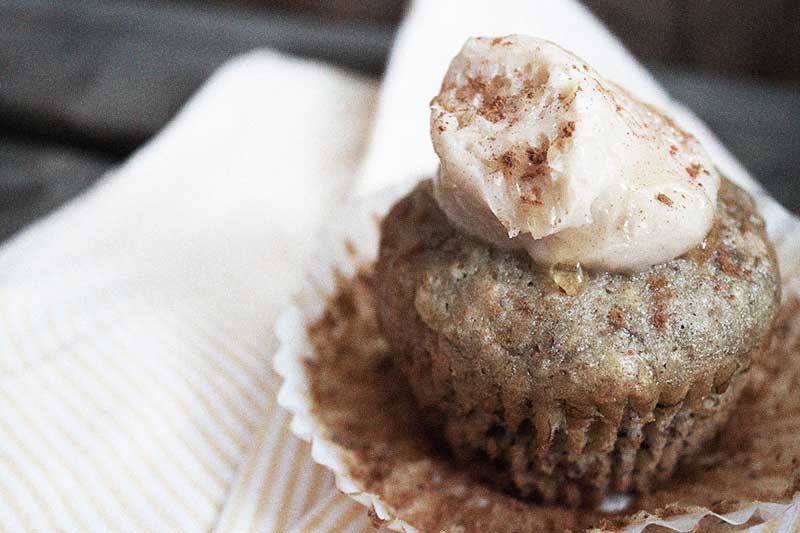
4 / Pipe onto cupcakes with your favorite tip!

Want to get fancy? Drizzle some honey over the top and sprinkle on some cinnamon!

This cupcake is so full of texture, but the banana and buttercream balance out the nuts beautifully! Serve them warm or cool, they are fantastic either way! Don't have mixed nuts in the house, most nuts will work. Maybe almonds? Walnuts? Hazelnuts? THEY ALL SOUND AMAZINGGGG!
I think this would make a great loaf as well, maybe with a brown butter glaze? What do you think? Breakfast or dessert?

Valentine's Heart (inside!) Funfetti Cupcake

Lets face it, sometimes we don't have time to bake totally from scratch. We juggle jobs and friends and obligations, but we still want to indulge our sweet tooth, and we want to get festive for the holidays! Valentine's day is filled with, well, LOVE, and whether or not you have a spouse or a boyfriend, there are plenty of people you love and want to show them, but ain't nobody got time for that- in comes doctored boxed cake, with a twist!

I know we have all see the cupcakes with cute little shapes BAKED INSIDE, but have you tried it yet? You don't have to be a pro. Its super easy and you can do it with box mixes! So lets get crazy, and bake some pink vanilla hearts inside FUNFETTI. You can use a box mix, or use this recipe if you have the time.

Yield the amount on your box mix, and you'll probably have some extra hearts to snack on, YUM.

FOR THE PINK HEARTS /
1 pkg. Vanilla Cake Mix
water, eggs and oil as called for on the box (can replace oil with melted butter, the same amount as the box calls for)
1 tsp. red food coloring (or enough for however deep you want the color)
Small heart cookie cutter

1 / Preheat oven to temperature instructed by the box. Grease a shallow cake pan well. Set aside.
2 / Mix together the ingredients as the box instructs.
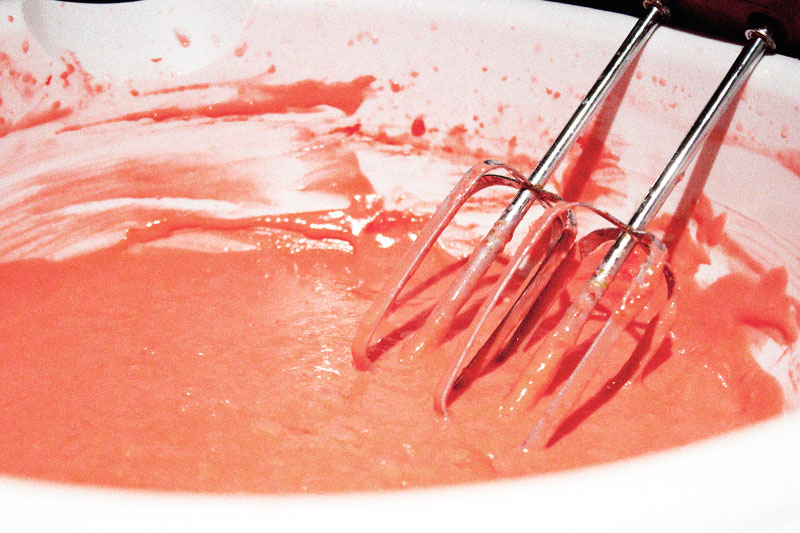
3 / Add food coloring to the batter mixture and beat until well combined.

5 / Pour the batter into the prepared shallow cake pan and bake according to box instructions. Do not over bake.
6 / In pan, cool baked cake until completely cool. To speed up the cooling process, you can place the cake in the freezer or refrigerator.

7 / Pop the cooled cake out of the pan and transfer onto a flat surface. Using your heart cookie cutter, cut out hearts and place onto a flat plate or surface.

8 / Freeze heart cutouts for 3 hours or overnight.
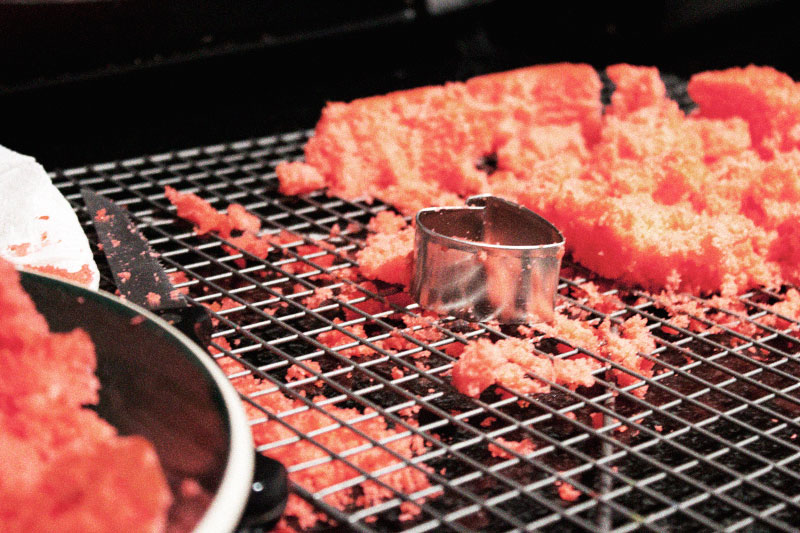
(It gets a little messy, but there are lots of scraps to snack on!)
FOR THE FUNFETTI BATTER /
1 pkg. Funfetti Cake Mix
water, eggs and oil as called for on the box (can replace oil with melted butter, the same amount as the box calls for)
1 pkg. vanilla pudding mix
1 / Preheat oven to temperature instructed by the box. Line a standard cupcake pan with liners, set aside.
2 / Mix together the ingredients as the box instructs.
3 / Pour dry pudding mix into the batter mix and beat until well combined.
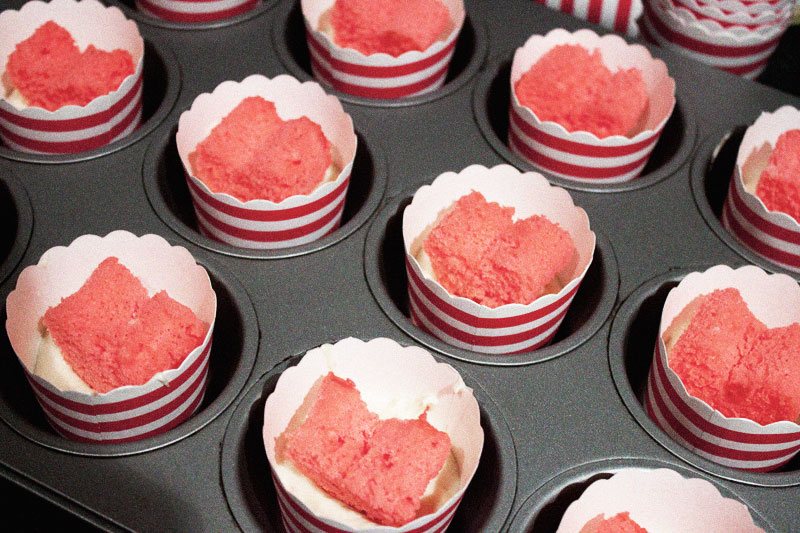
4 / Spoon about 1 tbsp. of the batter into the cupcake liners.
5 / Stand the frozen hearts upright in the batter. (Stand them like little soldiers all in the same direction and remember which way they are facing, it’s important to remember which way the hearts face for when you are done!)
6 / Spoon the rest of the batter around the heart and cover the heart.
7 / Bake for the recommended amount of time, inserting a toothpick or cake tester diagonally to test the funfetti batter, not the heart (they are already cooked silly!).

When you pull the cupcakes out, remember which way the hearts face! Use your favorite vanilla icing and top with a cute little heart candy in the same direction of the heart! When you cut the cupcake down the center in the correct direction (see I told you it was important to remember which way you put the hearts in!), VOILA, you will see a heart inside!

This idea works for any shape you want. Stars? Circles? Whatevs! People also do it for a surprise baby (boy or girl, blue or pink, get it?!).
How are you showing the ones you love you care this Valentine's Day?

Chocolate Hazelnut Cupcakes with Nutella Frosting

Ok kiddies, its been a while since I posted a cupcake recipe, and I know you missed them. I realized, I haven't posted a chocolate cupcake since the mason jar Chocolate Peanut Butter one back in September! So, what goes well with chocolate? Well, just about everything, but I thought we could get back into the swing of things with CHOCOLATE AND HAZELNUT. I mean, really, doesn't that just sound HEAVENLY?! Yes. I can hear you all saying YES.

When you think of hazelnut and chocolate, what do you think ok? Yup. that's right, Nutella... but I also think of Lindt Chocolate Hazelnut Truffles. Santa was good to me and left some in my stocking so I thought I would incorporate them into the recipe (and I am so glad I did!).

Click on the image above to download the printable recipe card. Recipe with images below...
GET BAKING!
Yields 24-30 cupcakes in standard liners

FOR THE BATTER /
1 cup strong coffee
¼ hazelnut coffee creamer
1 ¼ cup cocoa
2 ⅔ cup flour
2 tsp. baking powder
1 tsp. baking soda
1 tsp. salt
1 cup French Vanilla Yogurt
1 tsp. vanilla extract
1 cup butter (softened)
2 cups sugar
2 eggs
Optional: Lindt Hazelnut Truffles

BATTER DIRECTIONS /
1 / Preheat oven to 350˚F. Line a 2 standard cupcake pans with paper liners. Set aside.
2 / Stir together coffee, cocoa and hazelnut creamer until thick and well combined. Set aside.
3 / In a medium bowl, sift together flour, baking powder, baking soda and salt. Set aside.

4 / In a small bowl stir together yogurt and vanilla. Set aside.

5 / In a large bowl, with an electric mixer (or a stand mixer) cream together butter and sugar. Add the eggs one at a time and beat until fully incorporated.

6 / Starting with the flour mixture, add the flour mixture and yogurt mixture to the creamed butter in 4 parts. Mix with an electric mixer or stand mixer until well combined.

7 / Slowly add the coffee mixture and stir until just combined.

HERE THEY ARE, THESE DELISH LITTLE DARLINGS, THE IRRESISTIBLY SMOOTH LINDT TRUFFLES!
I know I said optional, but you should really work 'em in like I did, they take the cupcakes over the edge from divine to irresistible.

8 / Divide the batter amongst the lined cupcake pan. This is super important. Are you listening. Pay attention: FILL ONLY ½ WAY, not your usual ¾, this recipe rises more than most recipes! I filled mine too far, learn from my mistakes!
Optional: push 1 whole Lindt Hazelnut Truffle into the center of each cupcake and top with a small spoonful of batter.
Because I filled mine ¾, I did get 24 cupcakes, but they rise too high and spill over the edge a bit. When you fill yours ½ way, you will get over 24 cupcakes.

9 / Bake at 350˚F for 20-25 minutes or until a toothpick comes out just slightly crumbly. Do not over bake. It's ok if the toothpick has chocolate crumbs.
10 / Cool in the cupcake pan for 5 minutes, then transfer to a wire rack.

FOR THE FROSTING /
1 stick butter
1- 13oz container Nutella Hazelnut Spread
1 tbsp. vanilla extract
½ cup hazelnut coffee creamer
1 ½ cup confectioners sugar
Optional: Toasted Hazelnuts

FROSTING DIRECTIONS /
1 / In a large bowl, with an electric mixer (or a stand mixer) cream the butter.
2 / Add the Nutella, vanilla extract and coffee creamer.
3 / Slowly add the confectioners sugar and beat until well combined, the mixture should be light and creamy.
4 / Using whichever tip you choose, pipe the icing onto each cooled cupcake.
Optional: Top with toasted, chopped hazelnuts.
Icing can be refrigerated, covered, for a few hours or overnight. If refrigerated, with an electric mixer, beat until light in color and creamy again.

Lastly- take a bit! YUMMMMMMO. If you decide on the Lindt Truffles inside, you will not be disappointed (actually you won't be disappointed either way). Anywhoooo when they are warm from the oven, the chocolate is all gooey and wonderful. When they are cooled, it is crunchy and delectable. Either way, it gives an extra texture and depth to the cupcake that will blow your mind.

And there you have it, a cupcake as close to perfect as you can imagine. Chocolate. Hazelnut. More Chocolate. More Hazelnut. Oh. Mah. Gawd. These. Were. Good. Don't forget to click to get the recipe card to file away for later.
I think these are a perfect special occasion cupcake. Birthday. Wedding. Baby. Tuesday. What are some of your favorite chocolate combinations?
Quick & Easy Sweet Potato Cupcake w. Marshmallow Frosting

I don't know about you, but the holidays always sneak up on me. It's time for Thanksgiving already?! There are a bajillion potlucks to go to. A turkey to make. Stuffing. Sides. Table settings. Too much! Thinking about it makes me want to lay down and take a nap! BUT don't worry about an ornate dessert, I feel you, this week there is just no time, so how about an easy (but delicious) cupcake! Not only easy, but tastes like autumn should, because its made with SWEET POTATO.

Sticking with fall Pantone colors, this easy cupcake is inspired by a beautiful orange, PMS 167. PLUS how about a free Thanksgiving decor download. YOU GOT IT! Cupcake toppers & more. Click HERE to get the freebies for Thanksgiving! What are you waiting for?...

RECIPE BELOW, GET BAKING!
Yields 24 cupcakes in standard liners (Plus a little extra- I baked the excess in mini cupcake pans for a bite sized treat!)

FOR THE BATTER /
1 box Yellow Cake + whatever ingredients the box cake calls for
2 cans Sweet Potato
1 ½ tsp. cinnamon
pinch of cloves
½ tsp. nutmeg
pinch of ginger
¼ tbsp. molasses
¼ tsp. vanilla
½ tbsp. brown sugar

1 / Preheat oven to 350˚F. Mix together box cake mix and ingredients cake calls for according to box.

2 / In a separate bowl mash both cans of sweet potatoes, keeping the syrup they are canned in. Add cinnamon, cloves, nutmeg, ginger, molasses, vanilla and brown sugar. Note: This cupcake is supposed to be easy, and quick (and cheap!) so if you don’t have all the spices listed, get creative! (Make sure you add small bits at a time if you are adjusting the recipe and taste as you go, thats the best part!)

3 / Pour the sweet potato mixture into the cake mixture.

Blend on high for 3-5 minutes, scraping down the sides of the bowl as needed.

4 / Spoon the mixture into liners filling ⅔ the way. Bake for 20-22 minutes or until toothpick inserted into the center of the cupcake comes out clean.

... here's the thing, I can't lie to you. When these babies came out of the oven, they were UGLY. I was so nervous, and pretty positive, they would taste how they looked, but thank-goodnessss I was wrong! They were delicious. Moist. Addictive. Wonderful. Here's what I think: I opened the oven a bunch of times to check on the minis that were in, then a bunch of times to check on these, so I think I made them sink. Mah-B. Anywhoooo, they taste great (especially after being frosted) so no worries if they ain'y pretty, we will dress 'em up!
I got a special request for a brown sugar topping on these darlings, so I obliged (in ½ the cupcakes). They were great, but its your call, don’t give yourself too much work, you've got enough to do! THEY TASTE AMAZING EITHER WAY!

FOR THE TOPPING (optional) /
¾ cup flour
½ cup firmly packed light brown sugar
1 tsp. ground cinnamon
5 tbsp. unsalted butter

1 / Melt the butter completely.
2 / Add the cinnamon and sugar to the melted butter and stir well with a spoon.
3 / Drop about a tablespoon of the mixture on the top of each cupcake before putting in the oven.

FOR THE FROSTING /
1 cup butter, room temperature
16 oz. container Marshmallow Fluff
1 cup powdered sugar
1 tsp. vanilla
8 oz. marscarpone (or cream cheese) - Sorry, not pictured above, it was a mid-recipe decision (and a good one at that)
1 / Beat butter until light and fluffy.
2 / Mix in Fluff, in two additions, alternating with the marscarpone.
3 / Add in the powdered sugar and beat until everything is incorporated.
4 / Pipe on the cooled cupcakes with your favorite tip!

I always though box cake was cheating but these cupcakes have proven me wrong, they are dang good! It tastes like a "homemade" cupcake (and perfect for Thanksgiving) with the addition of sweet potato and spices. Its perfectly moist. A revised box cake recipe CAN be a good thing, and make for a quick & easy cupcake!
